Dieser Leitfaden zeigt Ihnen als Admin eines Business-Kontos, wie Sie in einer Translayte-Testumgebung den API-Zugriff einrichten, einen API-Schlüssel erstellen, die API-Einstellungen Ihres Kontos konfigurieren, auf die Translayte-API-Dokumentation zugreifen und eine Testanfrage senden, um zu bestätigen, dass Ihre Integration von Anfang bis Ende funktioniert. Am Ende dieses Leitfadens verfügen Sie über einen funktionierenden API-Schlüssel, eine gespeicherte API-Konfiguration und ein über die API erstelltes Testangebot, das Sie in Ihrem Konto sehen können.
Ersteinrichtung
Bevor Sie einen API-Schlüssel erstellen können, müssen in der Testumgebung drei Dinge eingerichtet sein. Das Translayte-Team erledigt diese für Sie:
1. Zugriff auf die Testumgebung über Cloudflare. Die Testumgebung ist durch Cloudflare Access geschützt, daher muss Ihrer E-Mail-Adresse Zugriff gewährt werden, bevor Sie sie im Browser öffnen können.
2. Ein Mock-Test-API-Konto. Das Translayte-Team erstellt in der Testumgebung ein Business-Konto, das als Testkonto gekennzeichnet ist, für Ihre API-Tests.
3. Eine Admin-Einladung. Das Translayte-Team lädt Sie als Admin zum Testkonto ein. Nehmen Sie die Einladungs-E-Mail an, um Ihr Passwort festzulegen und sich anzumelden.
Das ist alles, was für die Einrichtung erforderlich ist. Sobald Sie als Admin im Testkonto angemeldet sind, erstellen Sie Ihren API-Schlüssel, indem Sie den folgenden Abschnitten folgen, und fahren Sie anschließend mit allen weiteren Tests fort, die Sie benötigen.
Bevor Sie beginnen
Die Screenshots in diesem Artikel wurden in Translayte-Testumgebungen aufgenommen. Die Schritte und Bildschirme sind auf der Live-Plattform unter translayte.com identisch.
Die Translayte-API verwendet zwei Basis-URLs. Richten Sie Testintegrationen immer auf die Test-Basis-URL:
Test: https://translayte.dev/api/v1
Live: https://translayte.com/api/v1
Hinweis: Anfragen an die Live-Basis-URL erstellen echte Angebote, Kunden und Aufträge in der Produktionsumgebung. Führen Sie alle Tests ausschließlich über die Test-Basis-URL durch und verwenden Sie nur Beispieldaten.
Zugriff auf Ihre API-Einstellungen
1. Melden Sie sich in Ihrem Business-Konto an, klicken Sie oben rechts auf Ihren Kontonamen und wählen Sie im Menü Settings aus.
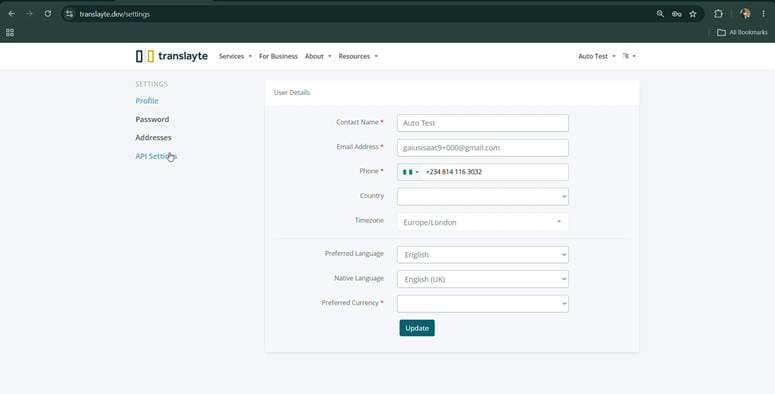
2. Klicken Sie auf der Seite „Settings“ im linken Menü unter Profile, Password und Addresses auf API Settings.
3. Die Seite „API Settings“ öffnet sich auf dem Tab API Keys. Wenn Sie noch keinen Schlüssel erstellt haben, wird die Meldung „Create an API key to access the API settings“ zusammen mit einer Schaltfläche Create API Key angezeigt.
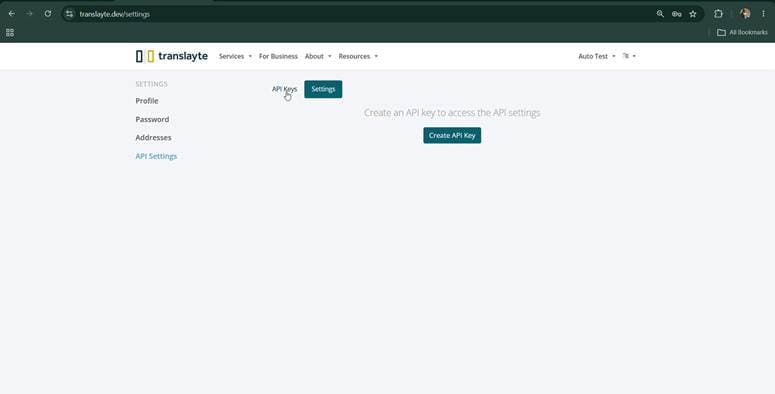
Hinweis: Der Link zur API Documentation oben rechts auf der Seite erscheint, sobald Ihr Konto mindestens einen API-Schlüssel hat.
Erstellen eines API-Schlüssels
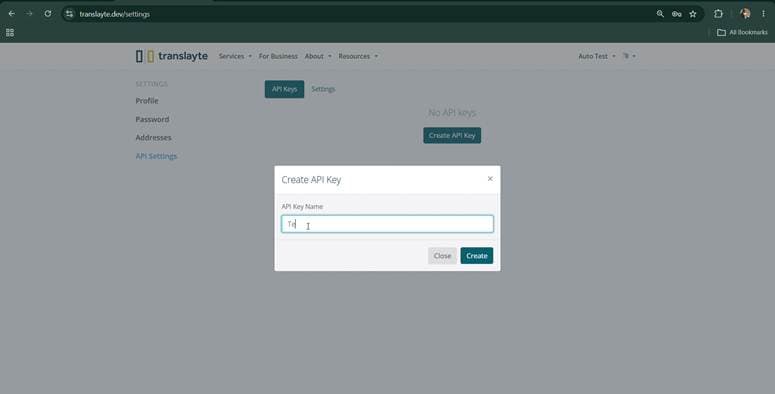
1. Klicken Sie auf Create API Key. Das Fenster „Create API Key“ öffnet sich mit einem einzigen Feld API Key Name.
2. Geben Sie einen aussagekräftigen Namen ein, der angibt, wo der Schlüssel verwendet wird, z. B. „Test Integration“, und klicken Sie dann auf Create.
3. Das Fenster bestätigt API Key Created und zeigt Ihren neuen Schlüssel einmalig vollständig an. Klicken Sie auf das Kopiersymbol neben dem Schlüssel und speichern Sie ihn an einem sicheren Ort, z. B. in Ihrem Passwort-Manager.
4. Klicken Sie auf Done. Ihr Schlüssel erscheint nun in der Liste der API Keys mit seinem Namen und einem maskierten Schlüsselwert.
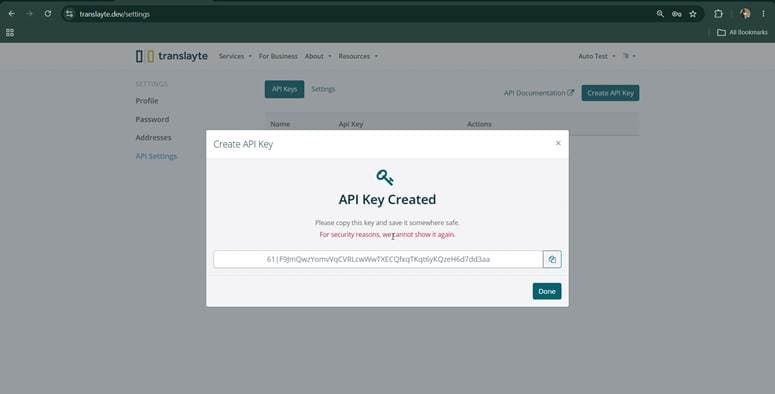
Hinweis: Kopieren Sie den Schlüssel sofort. Aus Sicherheitsgründen können wir ihn nicht erneut anzeigen. Wenn Sie den Schlüssel verlieren, löschen Sie ihn in der Liste der API Keys und erstellen Sie einen neuen.
Konfigurieren Ihrer API-Einstellungen
1. Klicken Sie auf den Tab Settings neben API Keys. Vier Optionen auf Kontoebene steuern, wie über die API erstellte Kunden und Aufträge sich verhalten:
Restrict pricing and invoice visibility: Kunden können auf der Auftragsseite und in E-Mails keine Preis- und Rechnungsinformationen sehen.
Restrict client from adding shipping: Kunden können auf der Auftragsseite keinen Versand zu Aufträgen hinzufügen.
Make new clients Active: Neue Kunden, die über die API erstellt werden, werden als aktiv markiert. Standardmäßig sind sie inaktiv.
Restrict communication from Translayte to clients: Das Translayte-Team kann nicht per E-Mail oder Direktnachrichten mit Kunden kommunizieren. Systembenachrichtigungen werden ebenfalls deaktiviert.
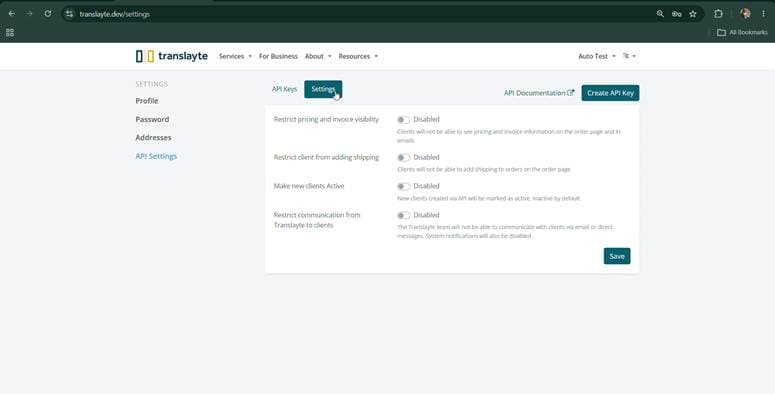
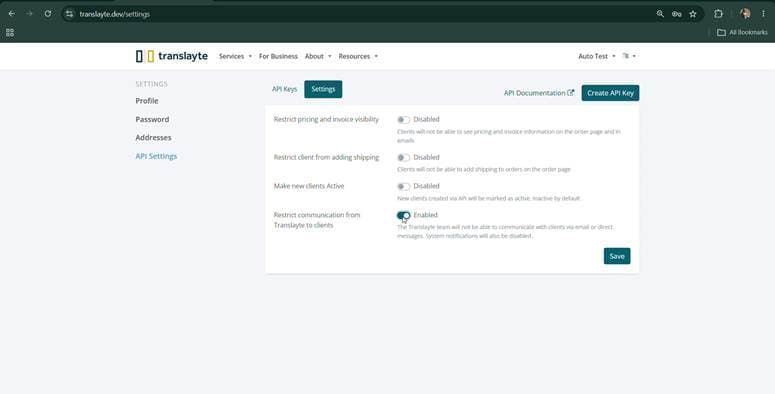
2. Klicken Sie auf einen Schalter, um ihn zwischen Disabled und Enabled umzuschalten. Im folgenden Beispiel wurde „Restrict communication from Translayte to clients“ auf Enabled gesetzt.
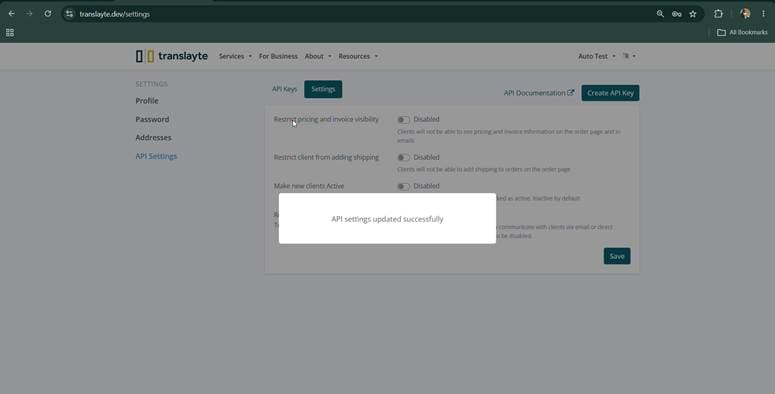
3. Klicken Sie auf Save. Es erscheint eine Bestätigung: „API settings updated successfully“.
Zugriff auf die API-Dokumentation
1. Klicken Sie auf der Seite „API Settings“ oben rechts auf den Link API Documentation. Die Translayte-API-Dokumentation öffnet sich in einem neuen Tab.
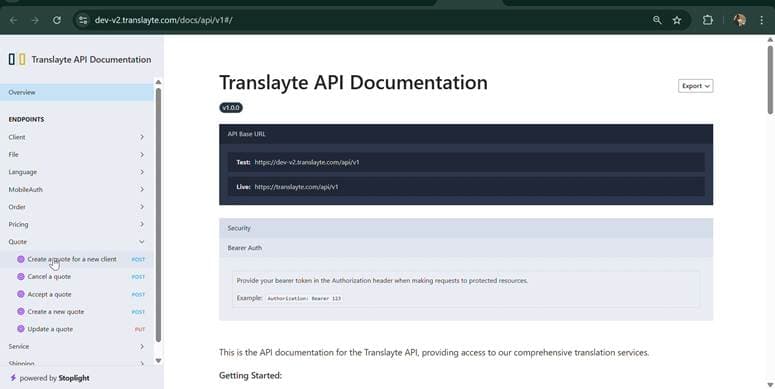
2. Die Übersichtsseite listet die Test- und Live-API-Basis-URLs auf und erklärt die Authentifizierung. Die API verwendet Bearer Auth, daher geben Sie Ihren API-Schlüssel in jedem Request im Authorization-Header an, z. B. „Authorization: Bearer 123“.
3. Das linke Menü gruppiert die verfügbaren Endpoints: Client, File, Language, MobileAuth, Order, Pricing, Quote, Service und Shipping.
Senden einer Test-API-Anfrage
1. Erweitern Sie im linken Menü der API Documentation Quote und wählen Sie Create a quote for a new client. Dieser POST-Endpoint unter /quotes/create-with-new-client erstellt gleichzeitig ein neues Angebot und ein Benutzerkonto für Kunden ohne bestehendes Konto und eignet sich daher gut als End-to-End-Test.
2. Fügen Sie im Request-Panel rechts Ihren API-Schlüssel in das Feld Auth Token ein.
3. Füllen Sie den Body mit Beispielwerten aus, z. B. Kundenname, E-Mail, Telefon, Locale, service_id, source_language_iso, target_language_iso, quantity, certification_type, country_of_use und urgency. Das Body-Panel listet jedes Feld mit Typ, Anforderungen und einem Beispiel auf.
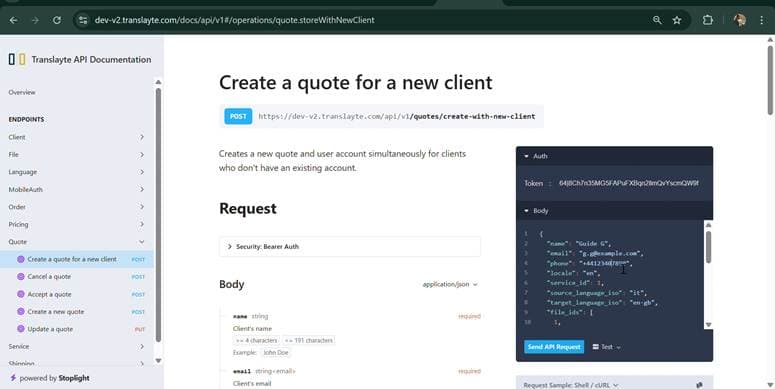
4. Klicken Sie auf Send API Request. Ein erfolgreicher Aufruf liefert 200 OK mit „success“: true und einem Quote-Objekt, das die neue Quote-ID, den Status („Quote“), die Beschreibung des Auftragsstatus, das Fälligkeitsdatum, Betrag, Währung und Preisinformationen enthält.
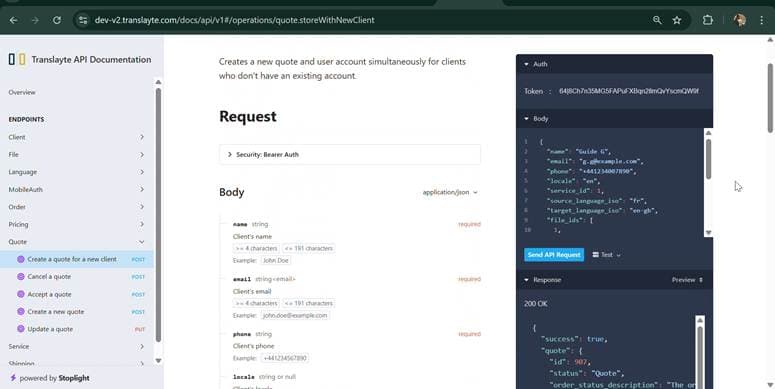
Hinweis: Dieser Test erstellt ein echtes Angebot und ein echtes Kundenkonto in der Testumgebung. Verwenden Sie Beispieldaten, z. B. eine E-Mail-Adresse von example.com, damit Testdatensätze leicht zu erkennen und zu bereinigen sind.
Überprüfen Ihres Testangebots
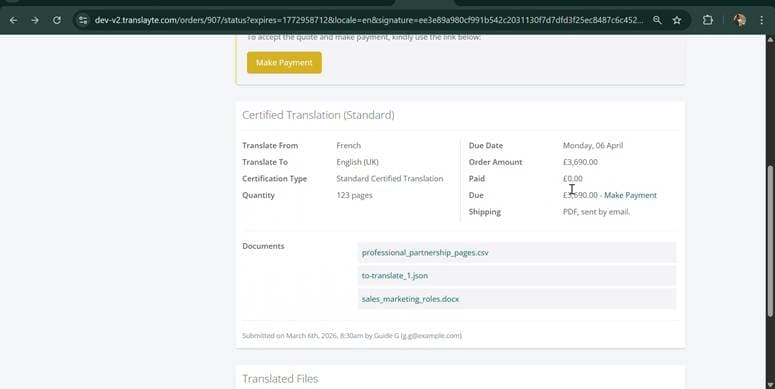
1. Der neue Kunde, der durch Ihre Anfrage erstellt wurde, erhält eine Angebots-E-Mail mit einem Link zur Angebotsseite. Öffnen Sie den Link oder melden Sie sich im neuen Kundenkonto an und öffnen Sie Orders.
2. Die Angebotsseite zeigt das Angebot genau so an, wie es durch die API erstellt wurde: das Sprachenpaar, den Zertifizierungstyp, die Menge, das Fälligkeitsdatum, den Auftragsbetrag, hochgeladene Dokumente und eine Schaltfläche Make Payment, um das Angebot anzunehmen.
3. Wenn diese Details mit den Werten übereinstimmen, die Sie im Request-Body gesendet haben, funktioniert Ihr API-Setup von Anfang bis Ende.
Videoanleitung - API Test Guide 1.mp4
Bitte wenden Sie sich an das Translayte-Vertriebsteam ([email protected]), wenn Sie weitere Unterstützung bei der Einrichtung Ihres Kontos benötigen.
Wir freuen uns darauf und sind gespannt, Sie an Bord zu haben.